

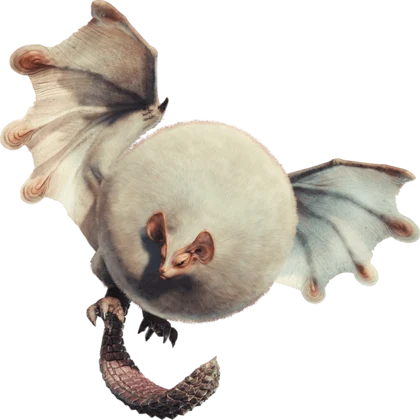
Paolumu is weak to Fire and Thunder. Break the head first and bring a Bow if you want the cleanest first clear. Deflate the danger, then hit the neck.
Field notes
Paolumu overview
Paolumu looks cuddly until it inhales. The inflated wind-sac turns its body into a floating menace and powers a wind attack that scatters the squad. The good news is that the expanded neck is a huge target. Break it and the monster loses much of its control.
Fire and Thunder are reliable elements. Ranged weapons can farm the wind-sac from a safe angle, while Dual Blades can punish the legs after a landing. The wings and tail are secondary breaks for gear materials.
At a glance
Weak to Fire / Thunder · Break Head, Wings, Tail · Found in coral highlands and cliff nests.
Element check
Paolumu weakness & best weapons
Elemental damage is only part of the answer. Choose a weapon that can safely reach the part you need to break. The recommendations below are a starting point for a first clear, not a hard rule.
| Weakness | Recommended weapon | Why it works |
|---|---|---|
| Fire / Thunder | Bow | Coatings, charge and clean angles It gives you a clean route to the main break. |
| Secondary option | Heavy Bowgun | Ammo, angles and aerial pressure Use it if you are already comfortable with the moveset. |
| Matchup plan | Dual Blades | A flexible alternative for players who prefer range, shields or a faster rhythm. |
What to break
Breakable parts & materials
The recommended break order is: 1. Head, 2. Wings, 3. Tail. This is the safest sequence for a typical first hunt. If your armor or weapon recipe needs a specific part, target that break and leave the rest for a later run.
Break priority
- Head
- Wings
- Tail
Known materials
- Paolumu Scale
- Paolumu Shell
- Paolumu Webbing
- Paolumu Fur
- Paolumu Tail
- Paolumu Plate
- Monster Bone+
- Radiant Paolumu Shard
Need a set to go with the farm? See the Paolumu Armor guide for skill direction and materials.
Hunt plan
How to beat Paolumu
Attack the inflated neck
When Paolumu inhales, the neck becomes the best hit zone. Focus it before the monster releases the wind blast. The deflation creates a long stagger and resets the pressure.
Move sideways on the wind-up
The wind blast is a wide cone. Roll perpendicular to the head and re-enter after the pulse. Do not try to outrun it directly, especially with a heavy weapon drawn.
Punish the landing
Aerial passes end with a soft landing. Position near the center and wait for the descent. The wings are easier to break on the ground than during flight, and the tail can be severed after a topple.
Radiant Paolumu turns the floor into a hazard
Radiant Paolumu is confirmed in the beta files. Its Radiantite-charged wind leaves hazardous pockets on the ground. Use the same neck-break plan, but move after every burst instead of holding your position.
Radiantite watch
Radiant form & variant notes
Radiant Paolumu is a confirmed transformed hunt. Radiant Paolumu is confirmed in the Aesoland roster. Its wind blasts are augmented by Radiantite and leave lingering hazards. The neck remains the best break; control the space before chasing a wing break.
Radiant rule
Carry the base weakness but plan for the new hazard. A safe clear with slightly lower damage is better than a perfect elemental build that spends half the fight healing. Read the Radiant species guide.
Preparation
Paolumu checklist
- Fire is the primary weakness; Thunder is a strong alternative.
- The inflated neck is the best target and creates a topple.
- Dodge the wind blast to the side.
- Break wings and tail only after the main threat is controlled.
First-clear rule
Pick one break, one element and one safe punish. Do not try to optimize the entire hunt before you have survived it once.
Quick answers